Flight control overview
Flight control
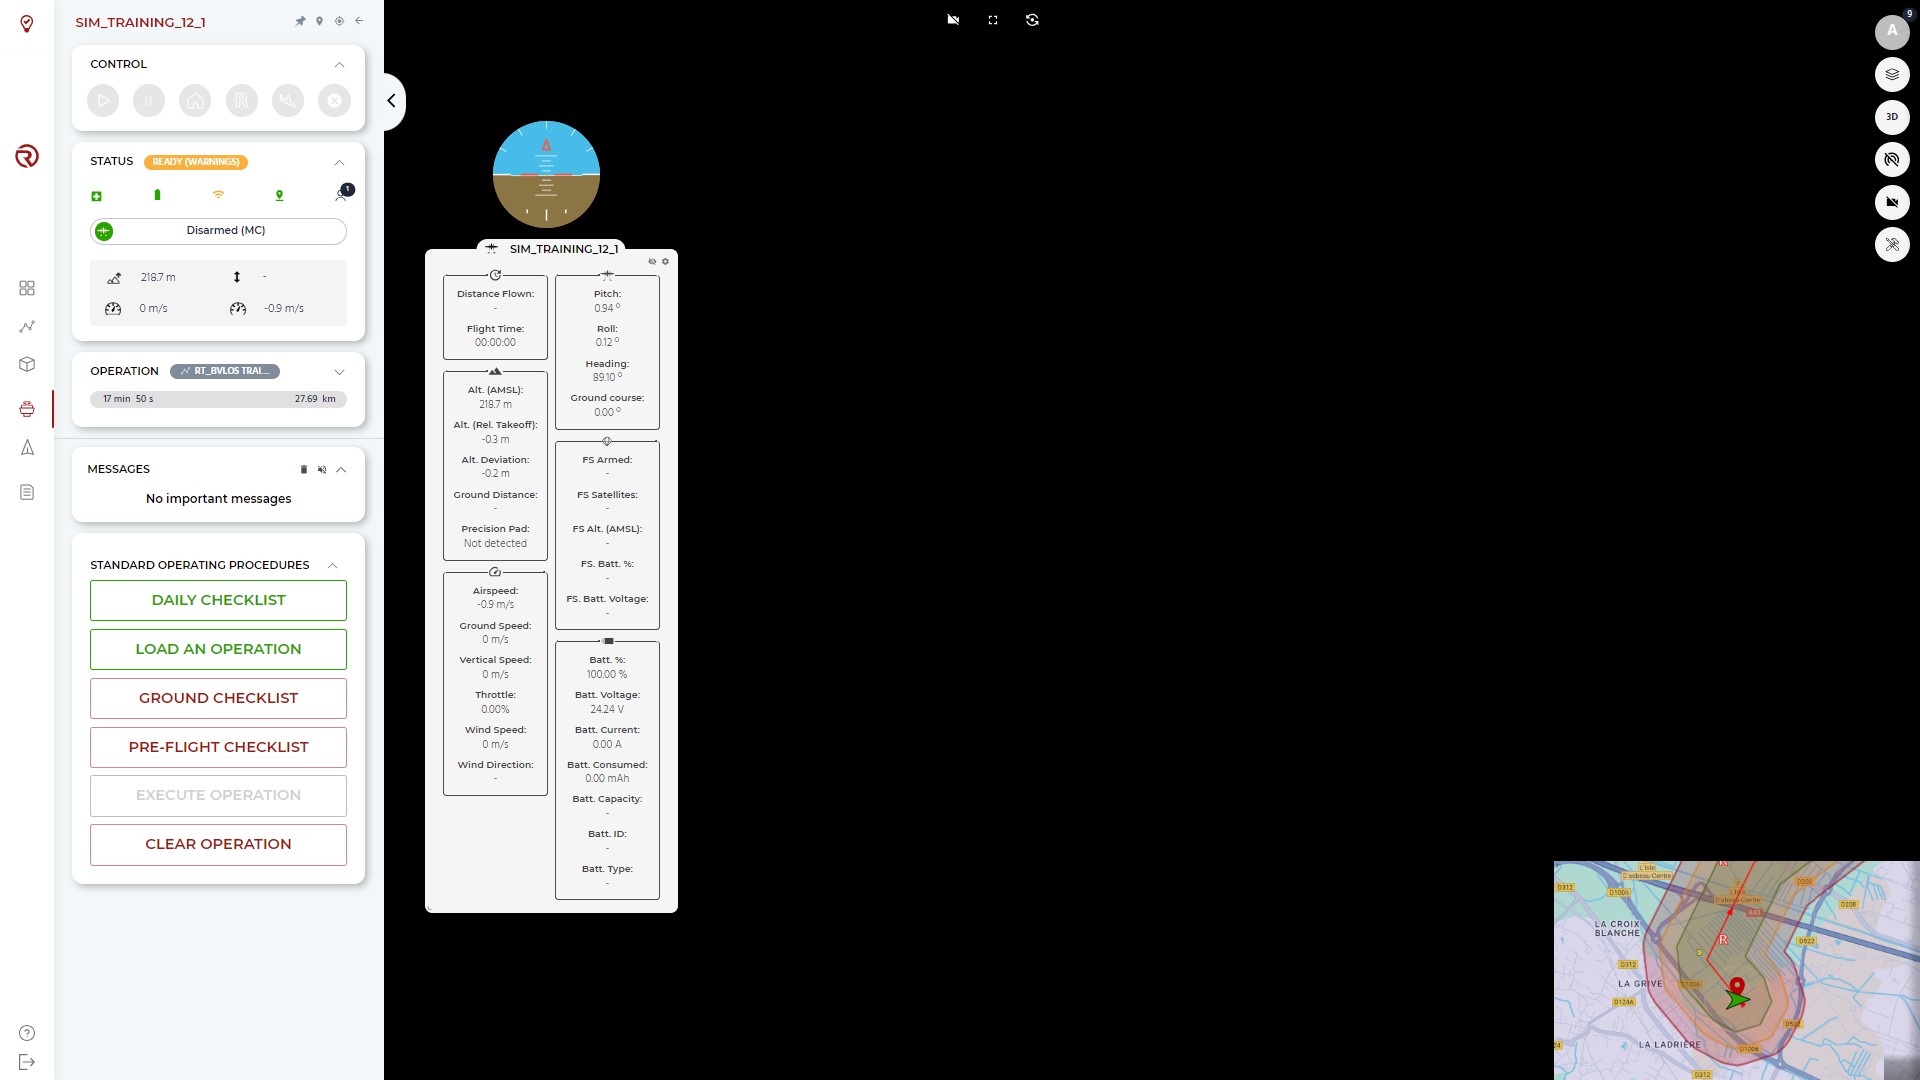
When a vehicle (or a simulated vehicle) is online and received by RigiCloud, it will be displayed on the map. It can be controlled and/or monitored by clicking on it directly on the map or by clicking on "Control" in the list of vehicles (or simulated vehicles).
The left pannel (drone control menu) includes, from top to bottom, the following elements:
- Drone and tools
- Command and control tools: shows the commands that can be sent manually to the vehicle.
- ID of the vehicle
- Control commands
- Messages, status and operation boxes
- Messages: shows relevant messages sent by the UAS to RigiCloud and RigiCloud messages.
- Status box: shows the status and health of the vehicle.
- Operation box: shows operational information of the vehicle.
- Standard Operating Procedures
- Telemetry
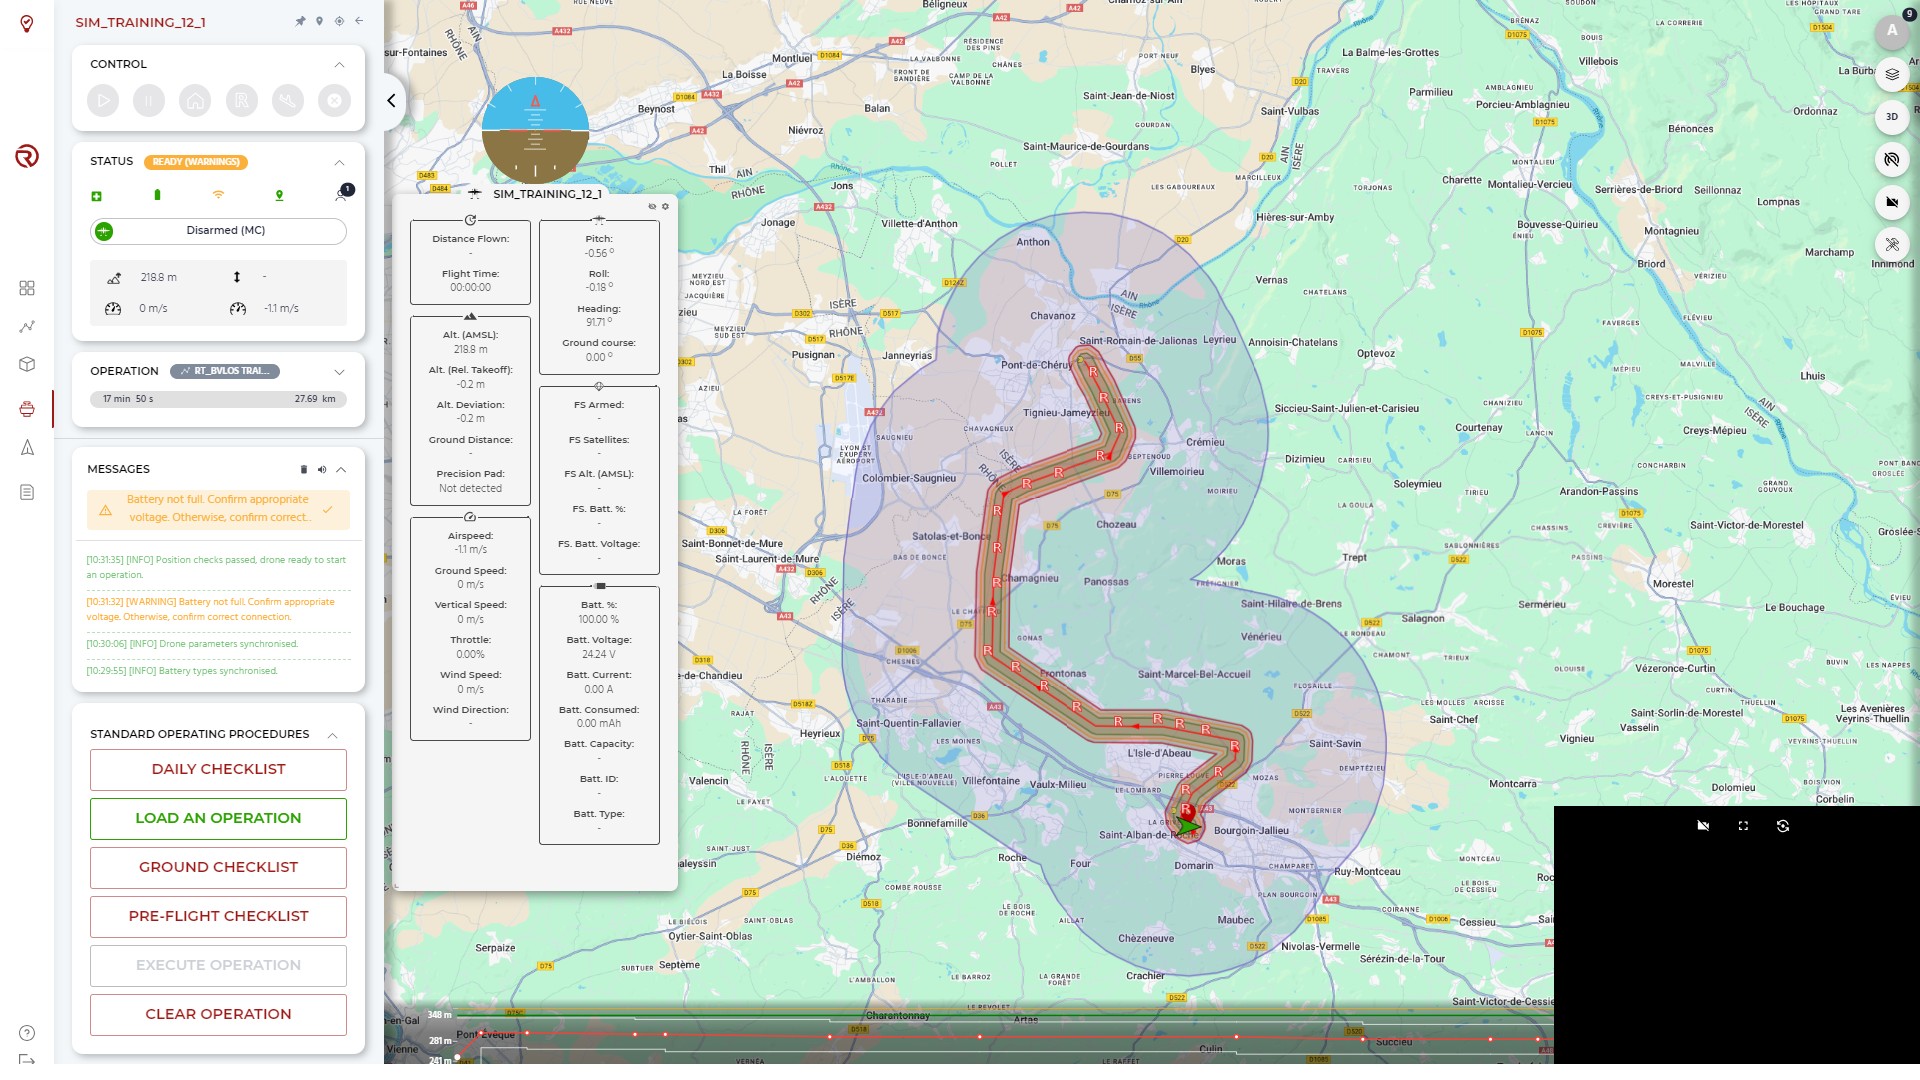
In the map, next to the vehicle/simulator, the following elements can be represented:
- Secondary GNSS position: represented with a red dot. Depending on the resolution of the map, it may be hidden behind the vehicle icon.
- Wind direction: represented with an arrow.
Command and control tools and filters
![]()
Command and control tools allow to filter certain map elements of the operation, fix the map to the vehicle, go to the drone and leave the control of the vehicle. From left to right:
- Show/hide mission: shows/hide the mission (i.e. the flight plan) uploaded to the vehicle.
- Show/hide geocages: shows/hide the geocage (and other surfaces) of the operation.
- Show/hide rally points: shows/hide rally points of the operation.
- Show/hide wind arrow: shows/hide the wind arrow (indicating the wind direction perceived by the UAS).
- Show/hide flight detector areas: shows/hide flight detector areas (two cylinders used for air traffic detection).
- Show/hide altitude profile: shows/hide the altitude profile of the flight plan and the terrain.

- Pin map to drone: fixes the center of the map to the position of the specific vehicle.
- Show last known position: shows the last known position of the UAS.
- Go to drone: goes to the position of the specific vehicle.
- Leave control: leaves the control of the specific vehicle.
Standard Operating Procedures (SOPs)
Load an Operation
Before any flight, an operation needs to be loaded into the UAS by clicking on "Load an Operation". The operation may have been scheduled previously (selecting a route, a name and a remote crew), but it is also possible to create it after taking control of a vehicle (or simulated vehicle).
After clicking on this button, a window will pop up, allowing to select an existing operation (by clicking on it) or creating a new one (by clicking on "Create new operation"). It is also possible to click on "Cancel" to cancel to process.

Independently of the path chosen, the last parameters and resources of the operation need to be confirmed.
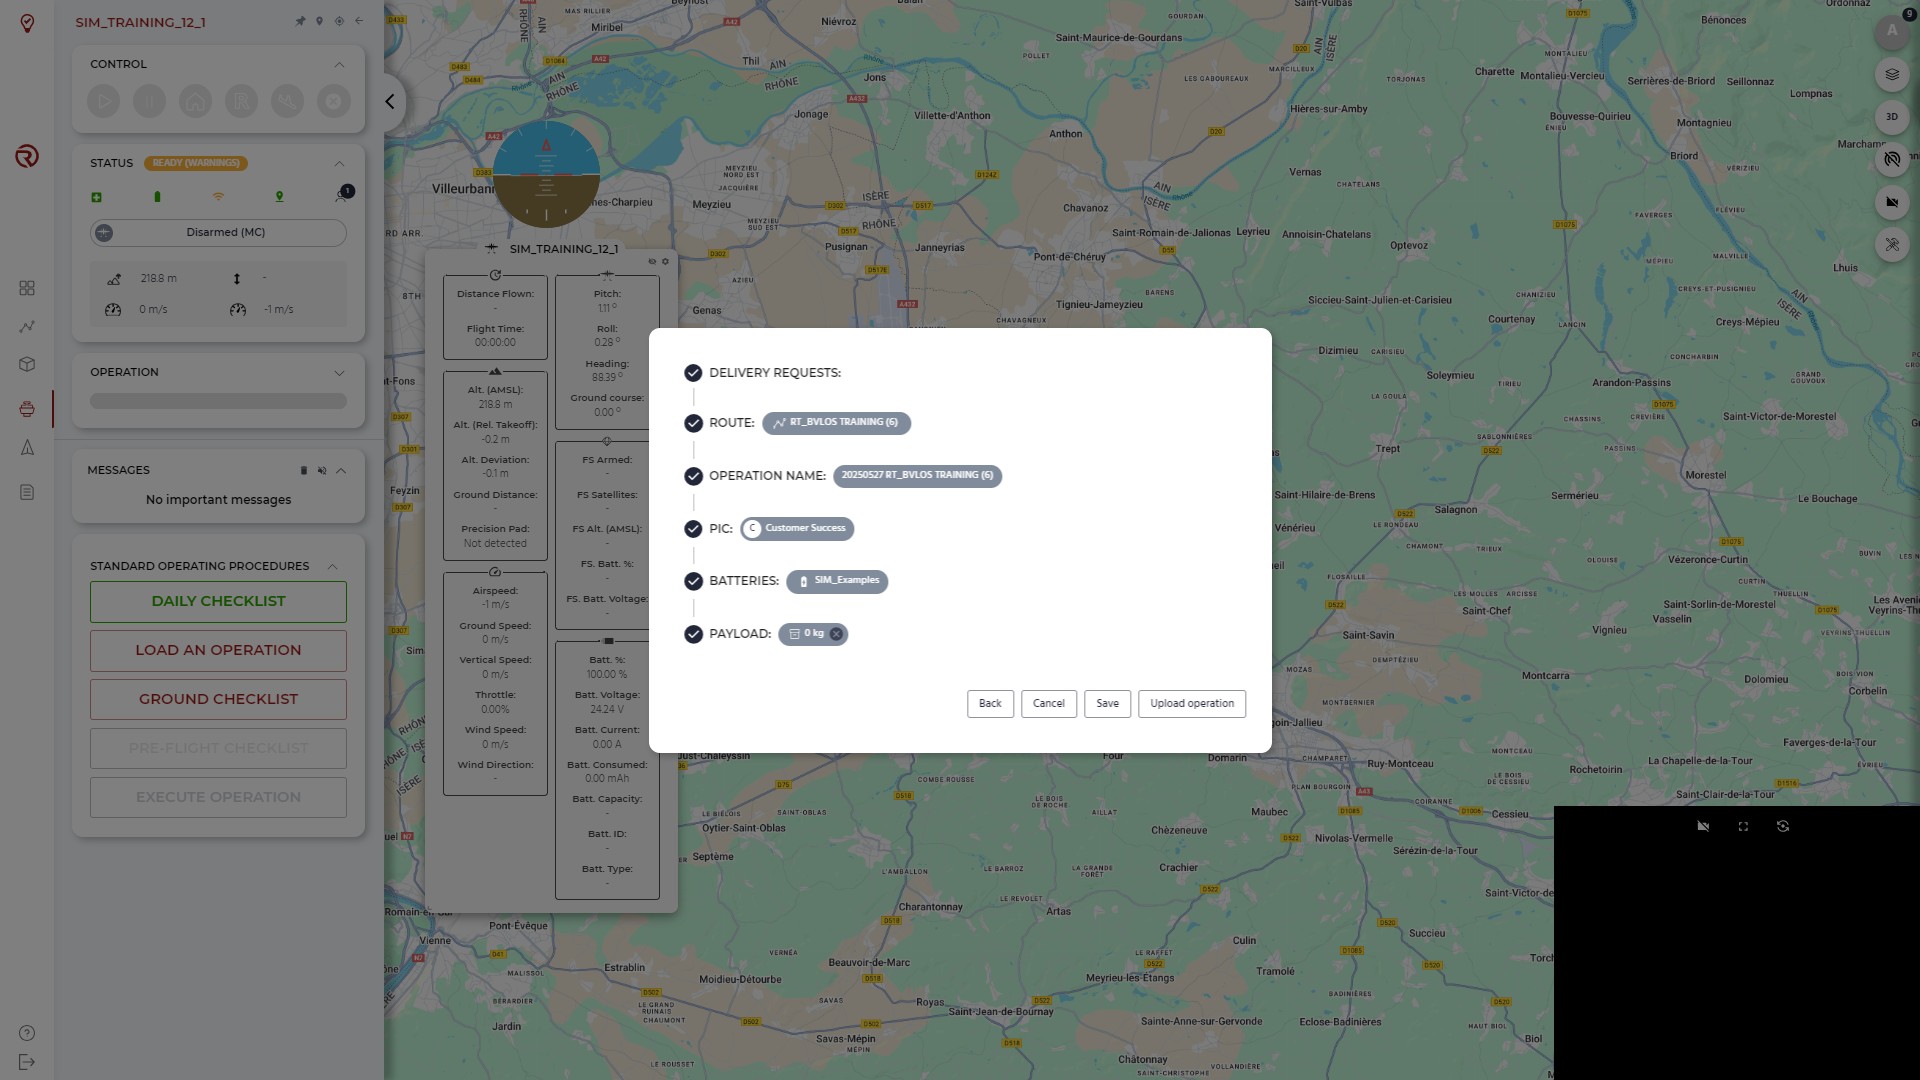
- Delivery requests: allows to link the operation to a delivery request (see Requests interface).
- Route: defines the flight plan linked to the operation.
- For real drones, only flight plans with APPROVED status can be uploaded.
- Operation name: allows to change the name of the operation and add comments. By default, the name of the operation is based on the date and the name of the flight plan.
- Remote crew: allows to add a PIC (by default, the user creating the operation) and, if any, other operators.
- Batteries: assigns batteries to the operation (the number will depend on the model of the vehicle used).
- Payload: assigns an estimated payload weight to the operation.
Once the resources are selected, it is possible to go back, to cancel, to save the operation created/modified and to upload it. The operation will not be uploaded if there is any technical error in the flight plan.
It is possible to clear the operation by clicking on "Clear Operation".
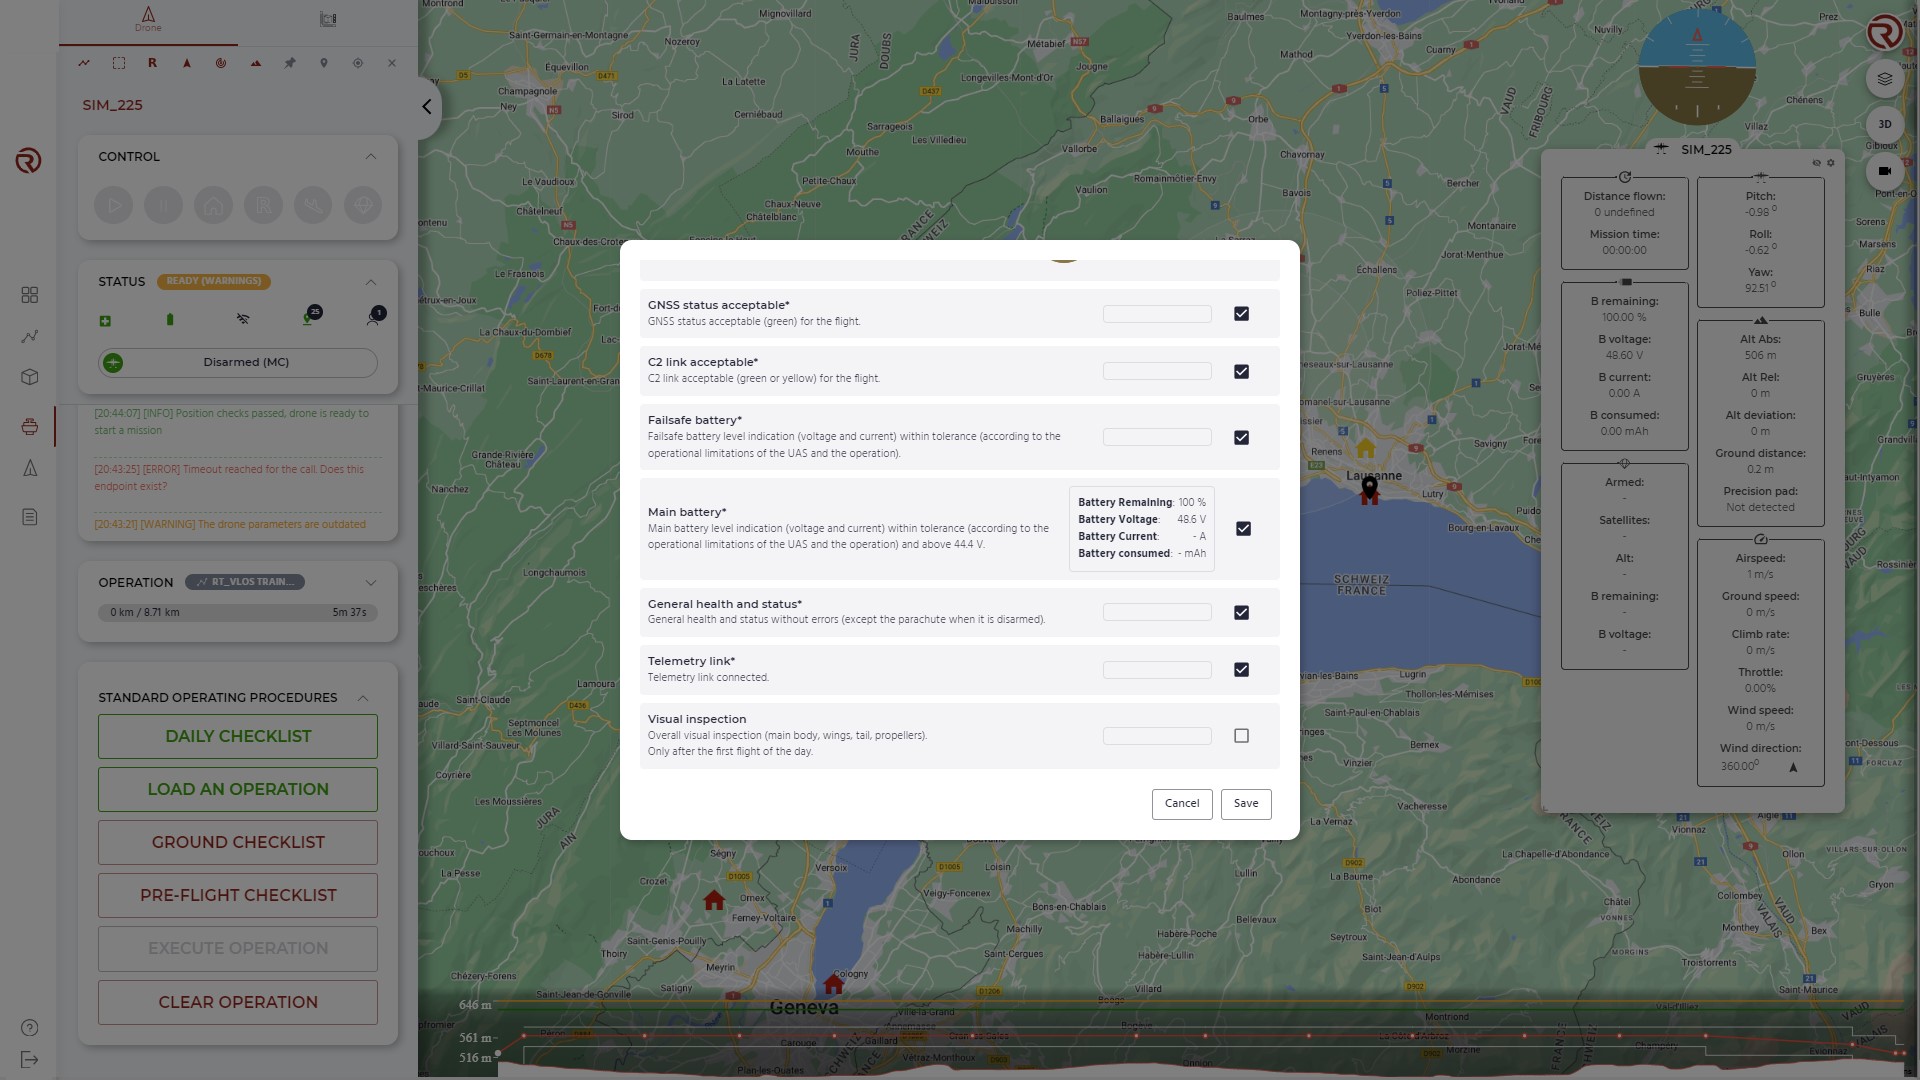
Checklists
There are up to three levels of checklists, based on the Standard Operating Procedures of the UAS (as defined in its Flight Manual):
- Daily checklist: it needs to be executed at least once a day. It may include FTS, motors and servo checks.
- Ground checklist: it needs to be executed before every flight. It may completed by ground personnel before uploading the operation.
- Pre-flight checklist: it needs to be executed before every flight. It needs to be completed after uploading the operation.
When configured for the project, the different checklists may appear. By clicking on any of them, a window will pop up with the specific checklist.
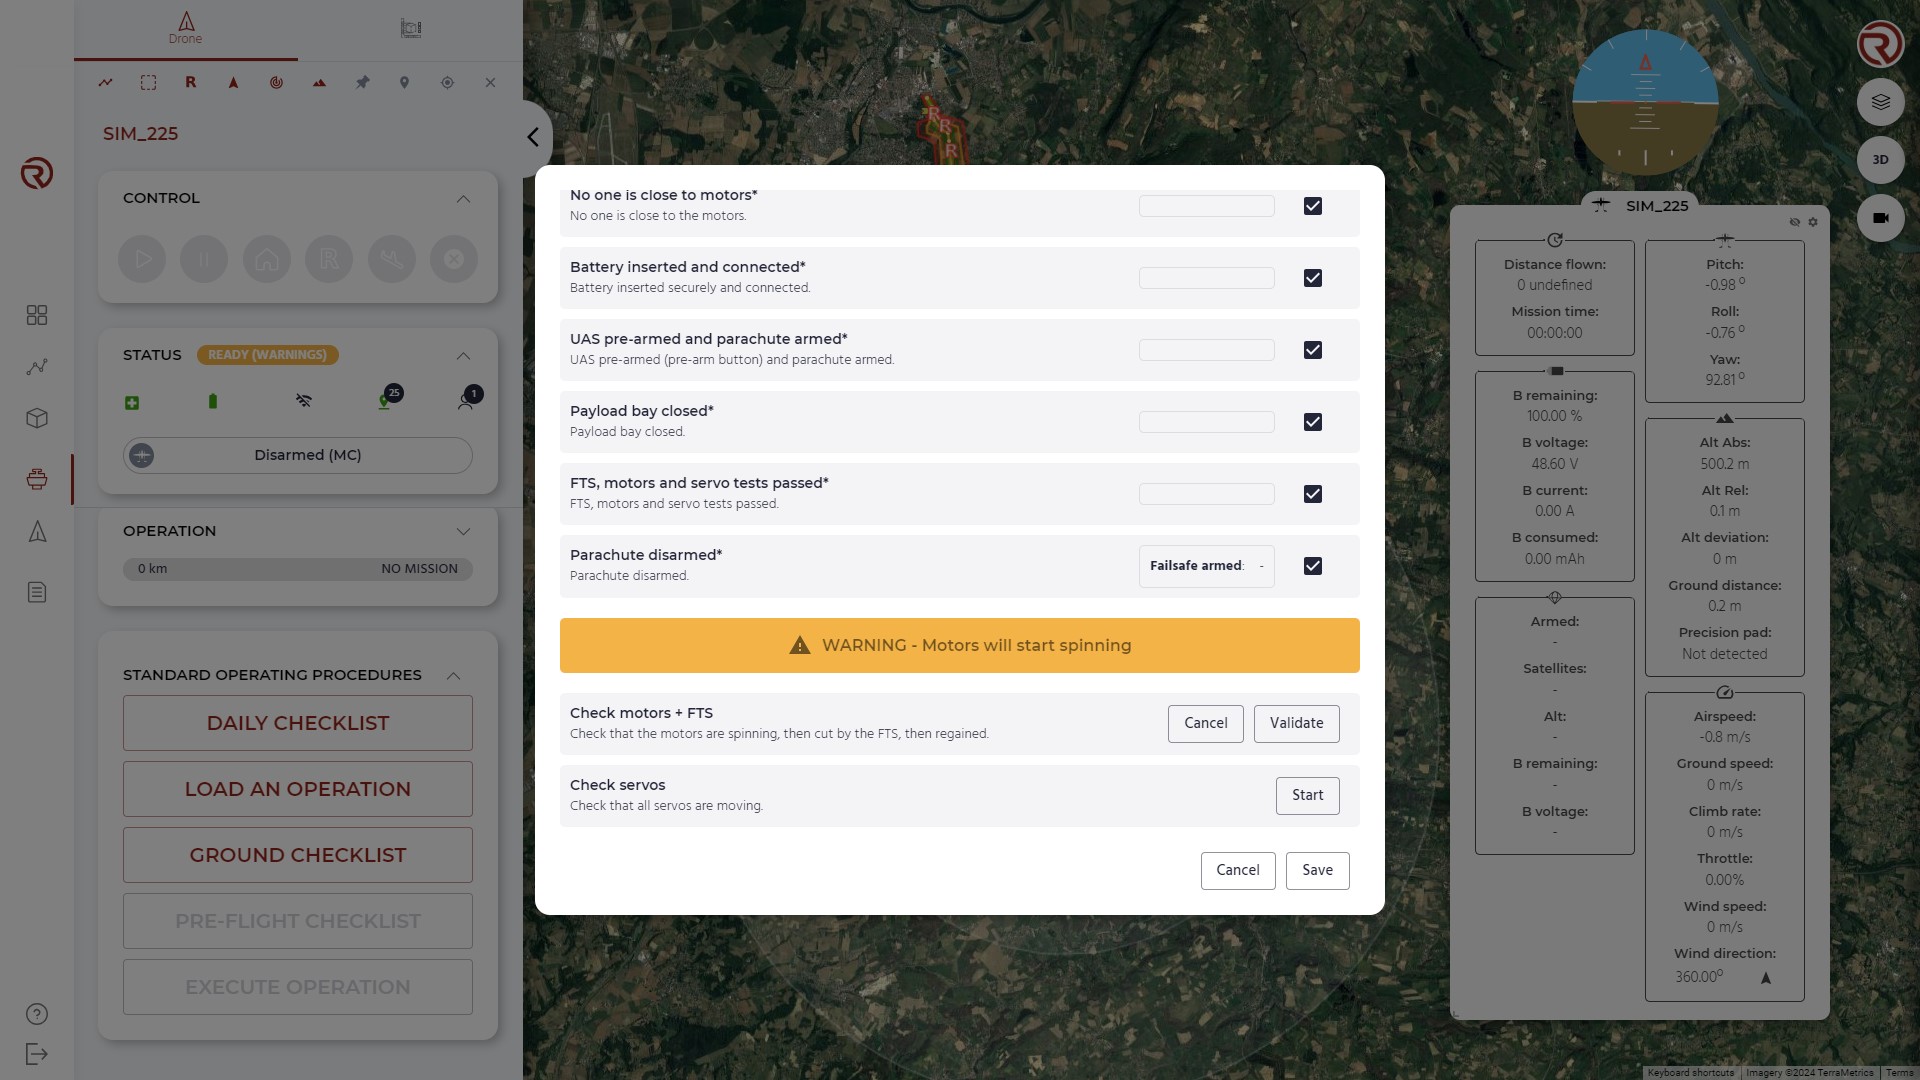
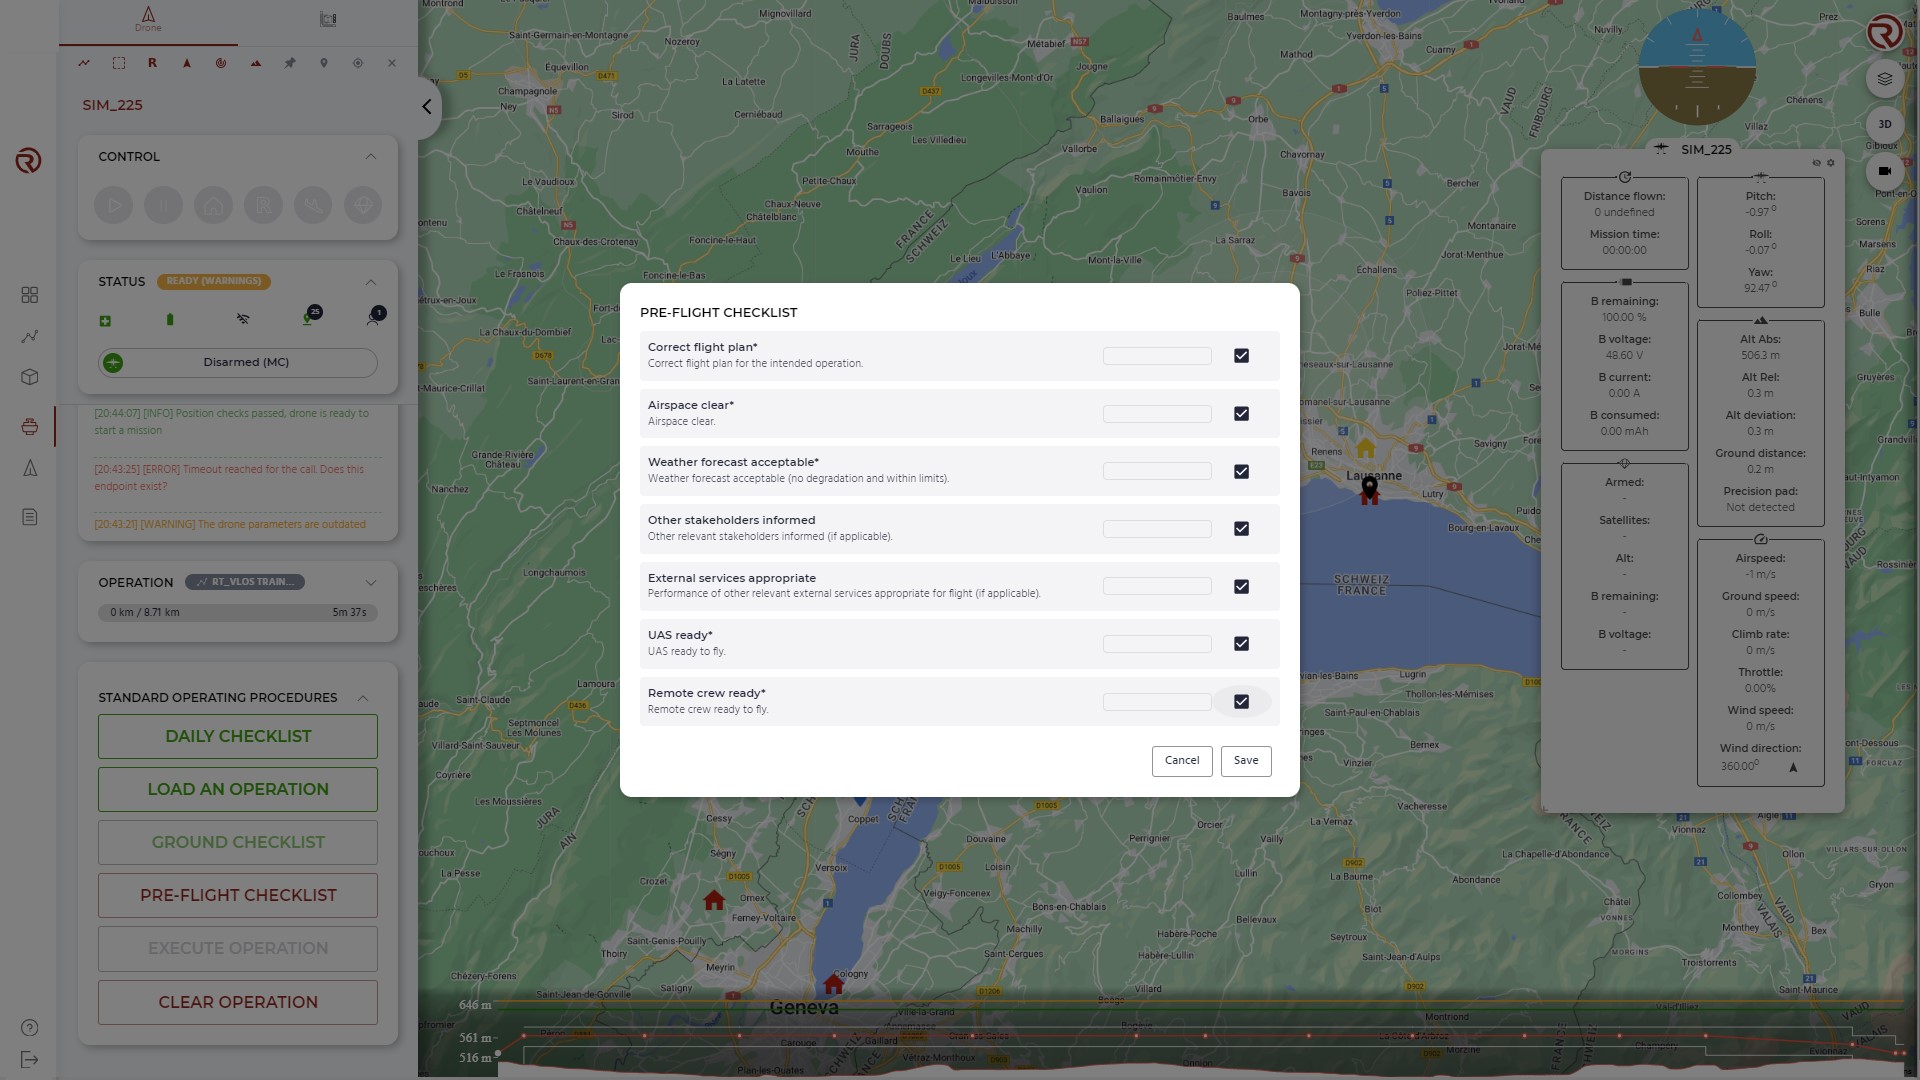
- FTS, motors and servos checks:
- FTS, motors and servs checks are particular checks that send commands to the UAS. SOPs, as defined in the Flight Manual of the UAS, possible complemented by the operator's needs, must be followed to ensure safety (e.g.: ensuring there is no one next to the motors, parachute armed, etc.)
- When clicking on "Start", the action will be executed by the UAS after a few seconds (depending on the model, it may beep before).
- It is possible to cancel them by clicking on "Cancel".
- Once they are validated, the user should click on "Validate".
- Checks with an asterisk next to them are mandatory. Others may be optional or depend on the operation.
- Some checks may include telemetry and/or indicator values to help verifying them.
- After completing all the mandatory checks, the user should click on "Save" to confirm the fulfillment of the checklist.
- Checkliststs passed will turn green. By hovering the mouse over a completed checklist, information on the user and the time of the validation will be displayed.
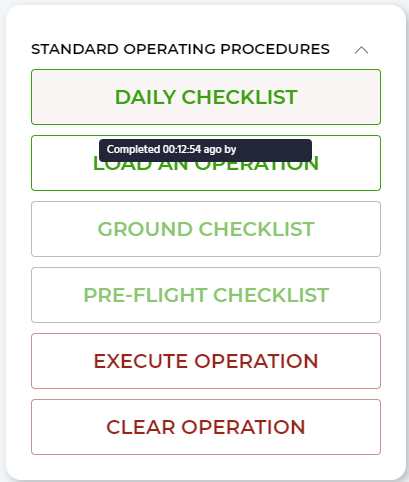
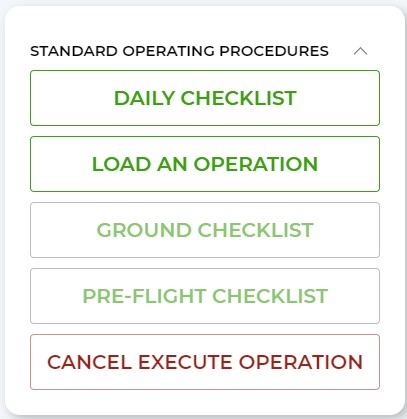
Execute operation
Once the checklists are completed, the operation can start by clicking on "Execute Operation", which will make the UAS (or simulated UAS) start its operation.
If the operation cannot be started for any reason, error messages will be displayed in the Messages box. The main reasons behind this could be an incorrect flight plan, an incorrect status of the vehicle (including, but not limited to, errors in sensors, communications or vehicle out of the geocage) or an incorrect positioning of the UAS compared to the takeoff position (vertical and horizontal).
It is possible to cancel the execution of the operation by clicking on "Cancel Execute Operation". Before executing the operation, the UAS will beep and a counter will be displayed in the Messages box.
Use of the camera
For UAS models with on-board cameras, live streaming of the camera/s can be shown/hidden by clicking on the "Open video player" button (top-right corner).

When the video player is available, it is possible to:
- Start streaming: sends signal to drone and starts video-proxy
- Full screen video
- Toggle camera (if more than one camera is available per drone model)
If Precision Takeoff (takeoff navigation supported by the camera) is enabled, the front camera cannot be accessed on ground or until takeoff is complete.