Control commands
Control commands
Control commands are used to trigger particular behaviours of the UAS during flight. The detailed performance after triggering each button may vary per UAS model. Additional details and particular precautions are given in the UAS Flight Manual. In particular:
- Turn direction and space required
- Margins required with geocage/pregeocage
- Altitude requirements
- Any other applicable precautions or requirements
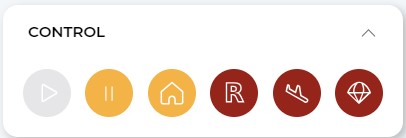
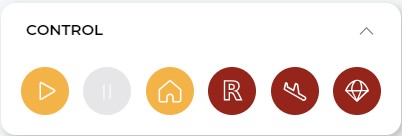
The colour of the buttons indicates the number of times a button needs to be clicked on in order to be executed. This is meant to avoid human errors when monitoring an operation. Yellow buttons require two clicks and red buttons require three clicks.
From left to right, the commands are:
- Continue operation (yellow, double click): cancels any contingency/emergency behaviour (except "Terminate") and continues the operation (returning to the nominal flight plan).
- This button is only available when a contingency/emergency command is triggered.
- Buttons triggered are disabled until the UAS switches to a different behaviour (e.g.: after continuing the operation or triggering another command).
- Hold (yellow, double-clicks): enters in hover mode (multicopter configuration) or loiter (fixed-wing configuration).
- RTO or Reverse to Takeoff (yellow, double-click): returns to takeoff by following a reversed flight plan.
- SRP or Smart Rally Point (red, triple-click): the UAS goes to the closest Rally Point (takeoff and landing positions included) and lands in multicopter configuration (after doing a back transition, if applicable).
- Land (red, triple-click): the UAS lands as soon as possible (requires a back transition if the vehicle is flying in fixed-wing configuration).
- Terminate drone with/without parachute (red, triple-click): terminates the engines (and triggers the parachute, only if enabled).
- This action is definitive.
- Depending on the safety configuration of the flight plan, the icon will show a cross (termination without parachute) or a parachute (termination with parachute).
GoTo command
The GoTo command directs the UAS to a specific geographic point. Upon arrival, the aircraft will Hold within its vertical and horizontal limits until a subsequent manoeuvre is triggered.
Selection
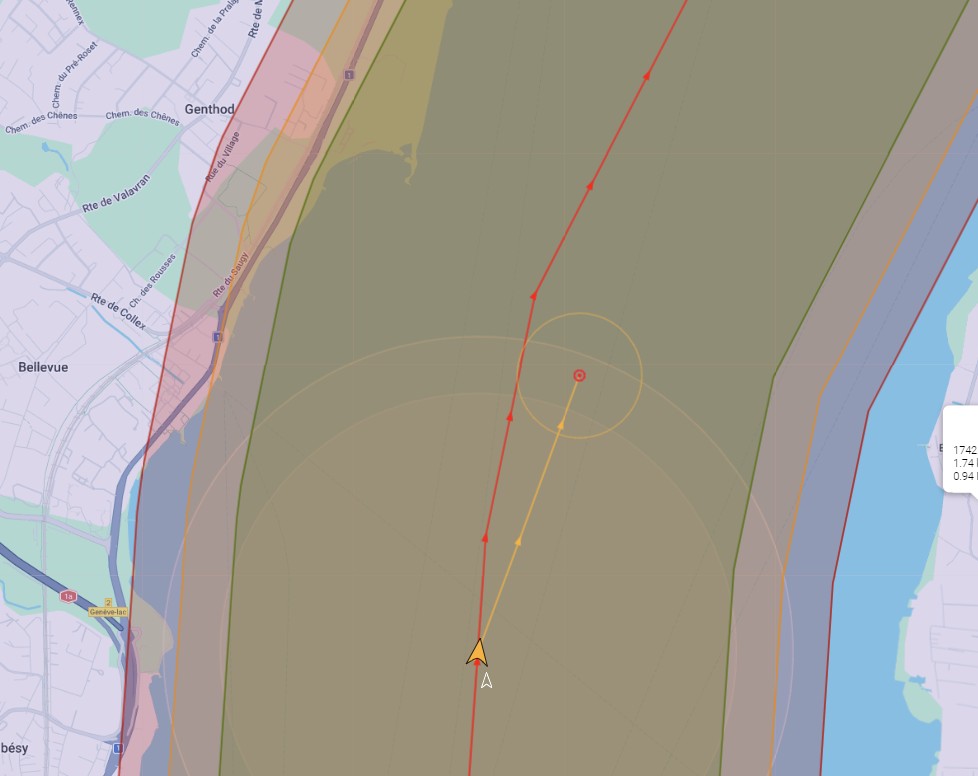
- Choose destination: Right-click on the map at the desired location and select "Go to".
![]()
- Review the confirmation window: a window will appear above the selected destination (marked by a red dashed point). This window provides:
- Expected terrain profile: a cross-section based on the terrain model, current UAS position, and destination.
- Altitude selector: allows for manual adjustment of the target altitude.
- Confirm button: executes the command.

UAS behaviour
Multicopter configuration
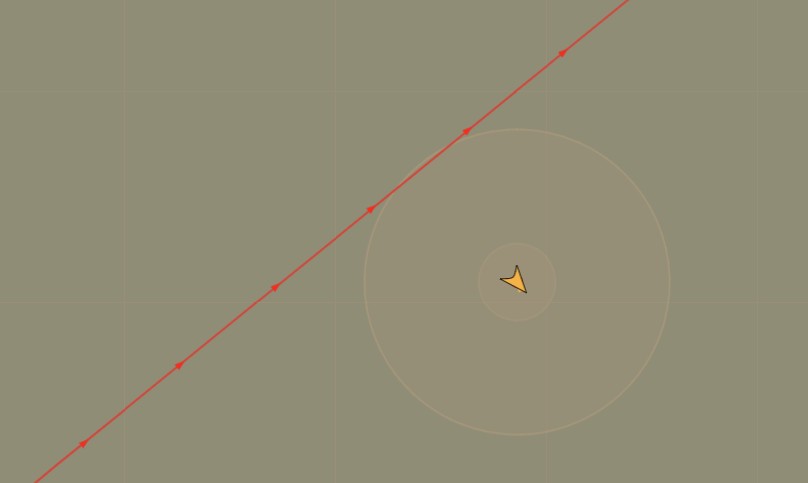
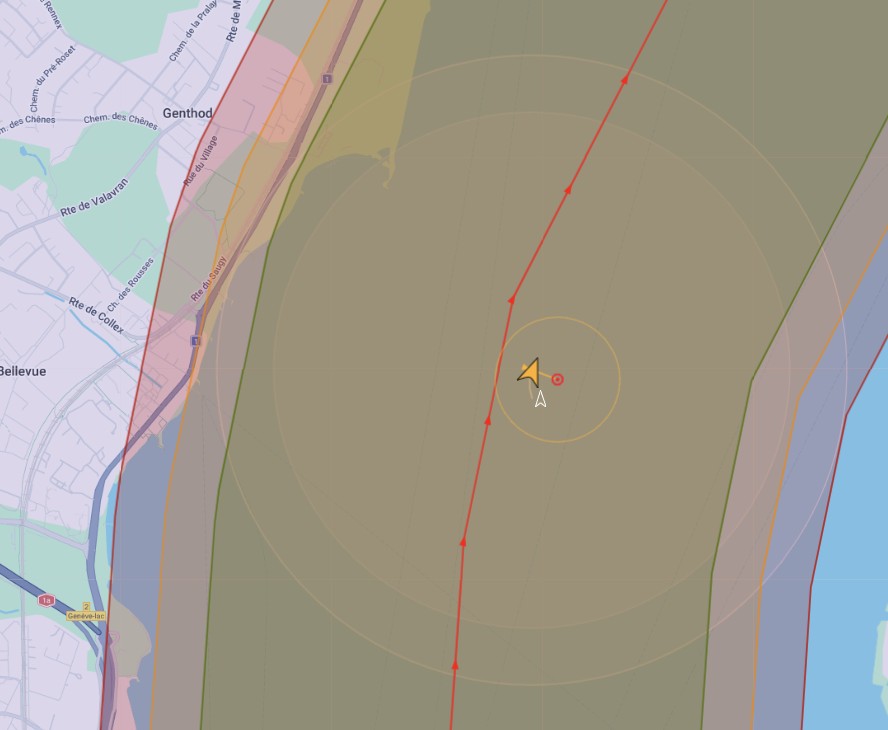
The UAS will deviate from its current flight path toward the destination point using a diagonal climb/descent.
- Path visualization: represented by an orange line on the ground control station (GCS).
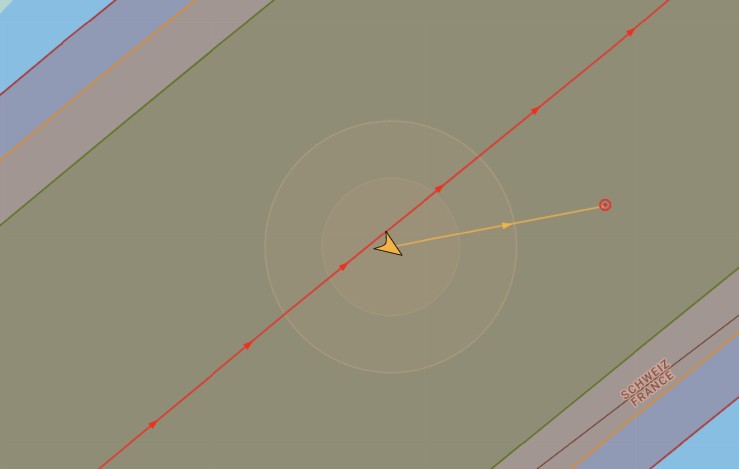
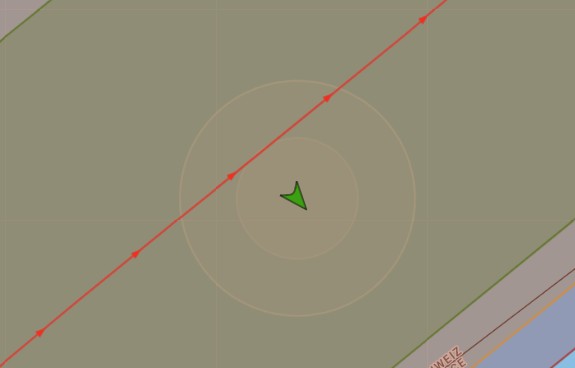
- Arrival: the UAS will maintain a stationary hover (Hold) at the destination point until a new command is issued.
Fixed-wing configuration
The UAS will deviate from its current flight path toward the destination loitering centre.
- Path visualization: Represented by an orange line.
- Climb/Descent: the UAS uses a diagonal path when possible. If the required altitude change exceeds the aircraft's climb/descent gradient capabilities, it will perform a helical (spiraling) manoeuvreupon reaching the target loitering position.
- Arrival: the UAS will loiter clockwise around the centre point.
- Loiter radius: By default, the radius represented is 250 m (the maximum required turning radius). The UAS typically loiters within this boundary.
Operational limits
- Horizontal limits: the destination point must be inside the pregeocage. Additionally, in fixed-wing configuration, the loitering radius (estimated automatically based on the wind conditions) must be inside the pregeocage as well.
- Superior vertical limits: the destination point must be below the pregeocage superior limits (represented with a dashed grey line).
- Inferior vertical limits: the destination point must be, at least, 30 m above the maximum altitude of the terrain within the flight path, as estimated by the terrain model.
Setting a destination point outside the limits will lead to an error message, as well as the impossibility to confirm the command.
Disclaimer:
- The altitude data sources do not include artificial and natural obstacles.
- The operator shall consult with their competent authority what sources are acceptable to ensure proper obstacle avoidance.
- The operator shall evaluate the presence of obstacles in their operational volume and plan operations accordingly.
- RigiTech is not responsible for any decision taken by the operator due to the interpretation of the altitude data.
Interaction with other commands
Triggering this manoeuvre will affect the operational information (remaining distance, expected time of arrival, expected battery at landing and in case of RTO).
- CO and RTO: if CO or RTO are triggered, the UAS will assess the automatically the best way to rejoin the planned flight plan and fly back to the branch-in point.
- Note: similarly to regular Hold manoeuvres, to avoid unexpected flight plans, it is recommended to trigger CO or RTO when the UAS is flying in the same direction of the flight plan (or opposite for RTO).
- Hold: if a Hold command is sent while the UAS is already holding at a GoTo point (or loitering around it), it will start holding around the position in which it is triggered.
- SRP:
- The UAS will fly back to the branch-in point (similar to what happens in the event of a CO or RTO), and then follow the normal SRP behaviour.
- Exceptions: when the UAS is already within the acceptance radius of the rally point (10 m, by default), the UAS will go directly to the rally point.
- Note: GoTo can be used to reposition the UAS closer to a preferred rally point, provided battery margins and obstacle clearance are maintained.
- Land and Terminate: these commands function normally and will override the GoTo/Hold state.
- GoTo: multiple GoTo commands can be used in sequence (e.g., to reposition the UAS in case of non-nominal landing). The operator should, however, account for potential uncertainties in the flight path, especially when using CO, RTO or SRP afterwards.
Responsibility
RigiTech UAS are designed for predefined flight plans with rigorous risk assessments. GoTo should be used with caution, especially in fixed-wing, as the UAS may face unexpected risks, such as:
- Unplanned overflight of populated areas or other risks.
- Proximity to unmapped terrain or obstacles.
- Pregeocage breach.
It is the responsibility of the operator to understand the risks of the manoeuvre and to simulate these scenarios beforehand to ensure GoTo is the appropriate response for the situation (e.g., to avoid an incoming aircraft).
In particular, operators must understand that in fixed-wing configuration, this manoeuvre should be used only when the margins with the pregeocage are large enough.