Control Tower
Overview
The Control Tower is, with the Airbridge Planner, the most important module of RigiCloud in terms of the flight operations. Here, all the connected drones (and simulators) of the project can be seen/monitored/controlled, as well as other features described in the previous sections if desired (routes, bases and markers, airspace, air traffic, weather, etc.).
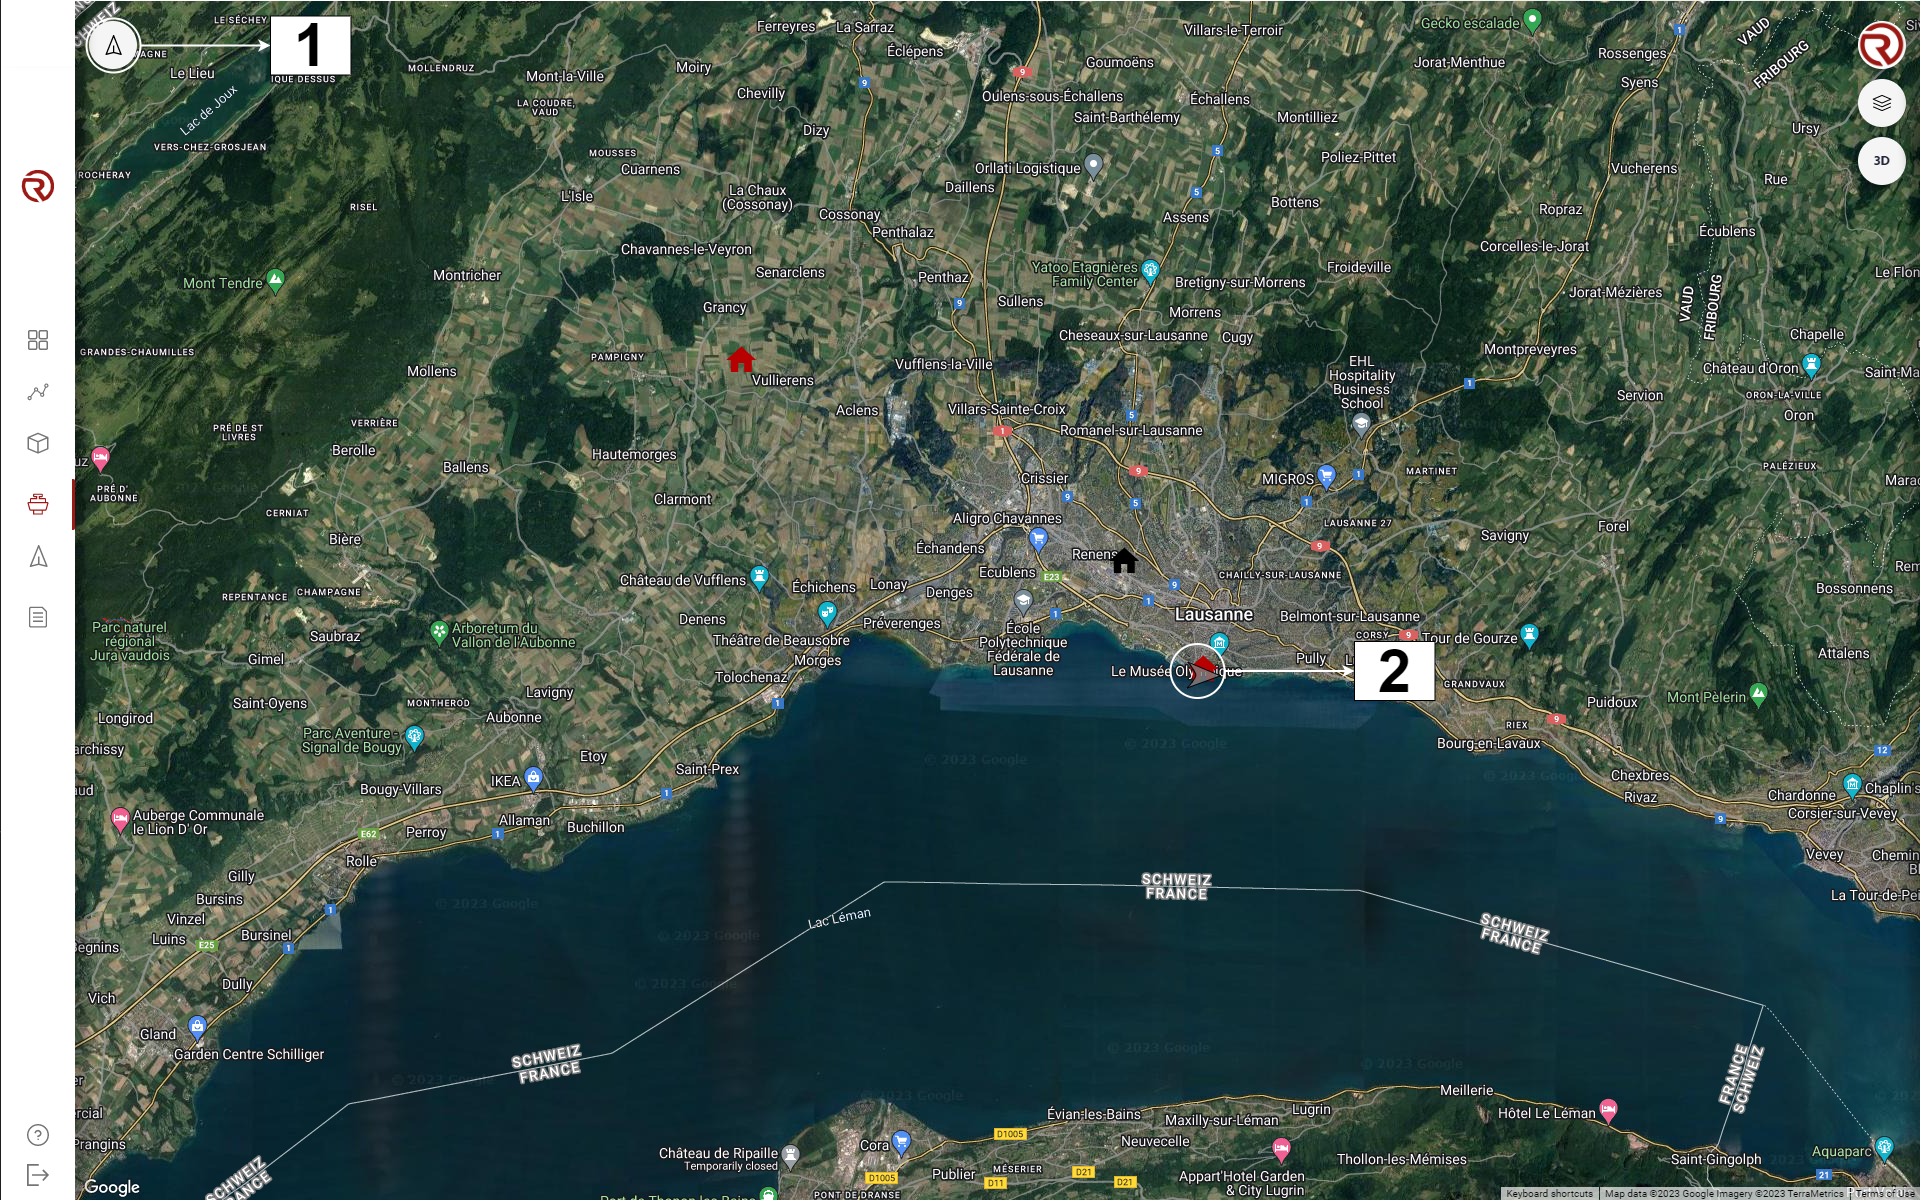
- Drone control: opens the drone control menu with a list of vehicles and simulators within the project.
- Example of simulator
The use of the map has been described in Map navigation and tools.
Drones
Once the "Drone control" button is clicked on, a menu will open, allowing to control a drone, a simulator or a simulated air traffic within the list, as well as taking its control (drone and simulator).
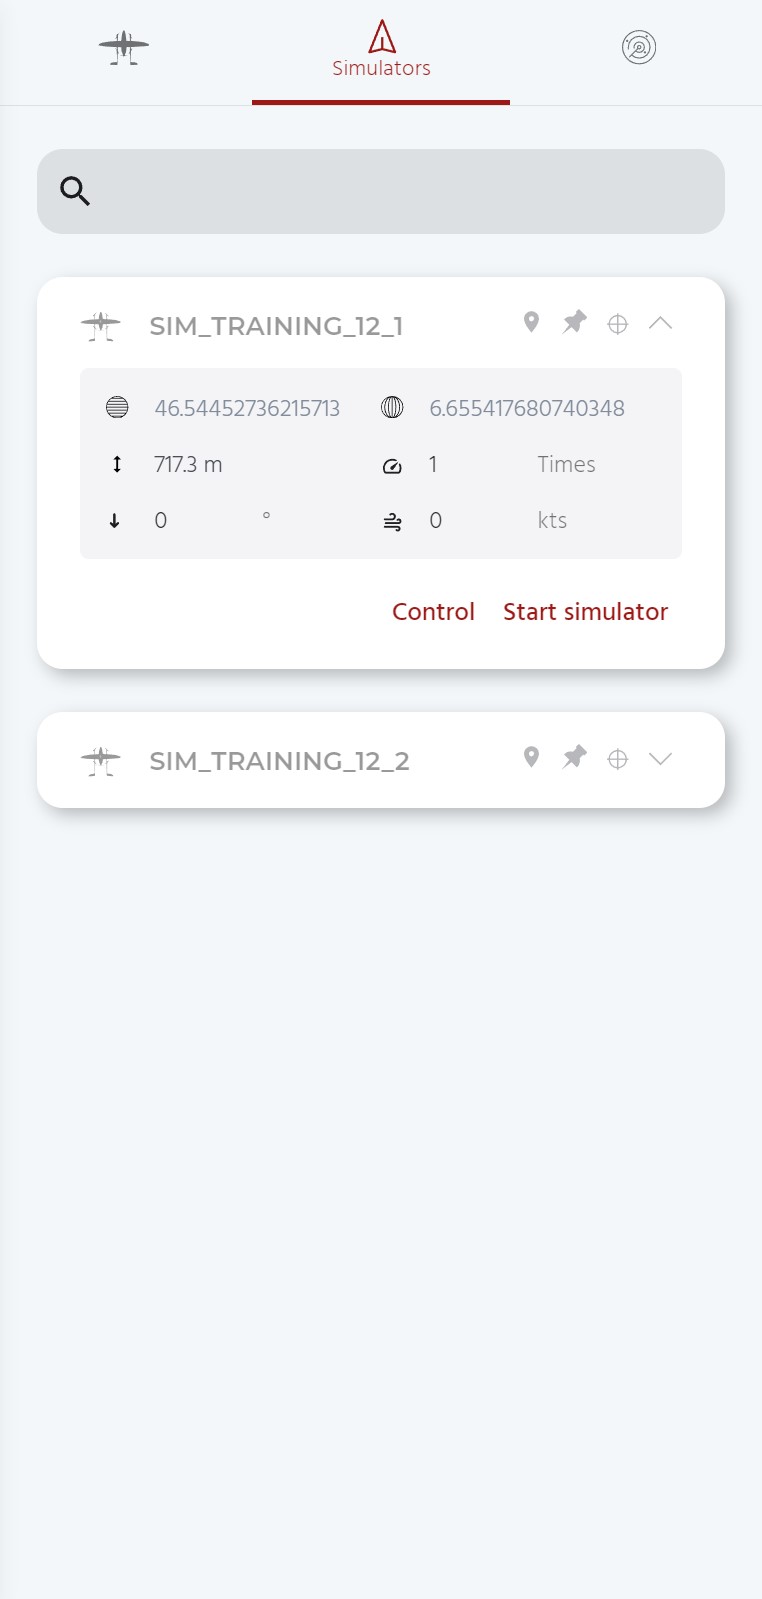
- Module selector switches between drones (left) and simulators (center) and simulated air traffic (right).
- Search box: allows to search for a specific vehicle/simulator.
- List of drones/simulators: list of vehicles within the project.
- Every drone/simulator is listed with their ID.
- If a vehicle is connected, the symbol will turn red and the status will be shown.
- Control: allows to take control of the vehicle (only for drones and simulators, see Flight control overview). This action can also be done by clicking on the symbol of a vehicle on the map.
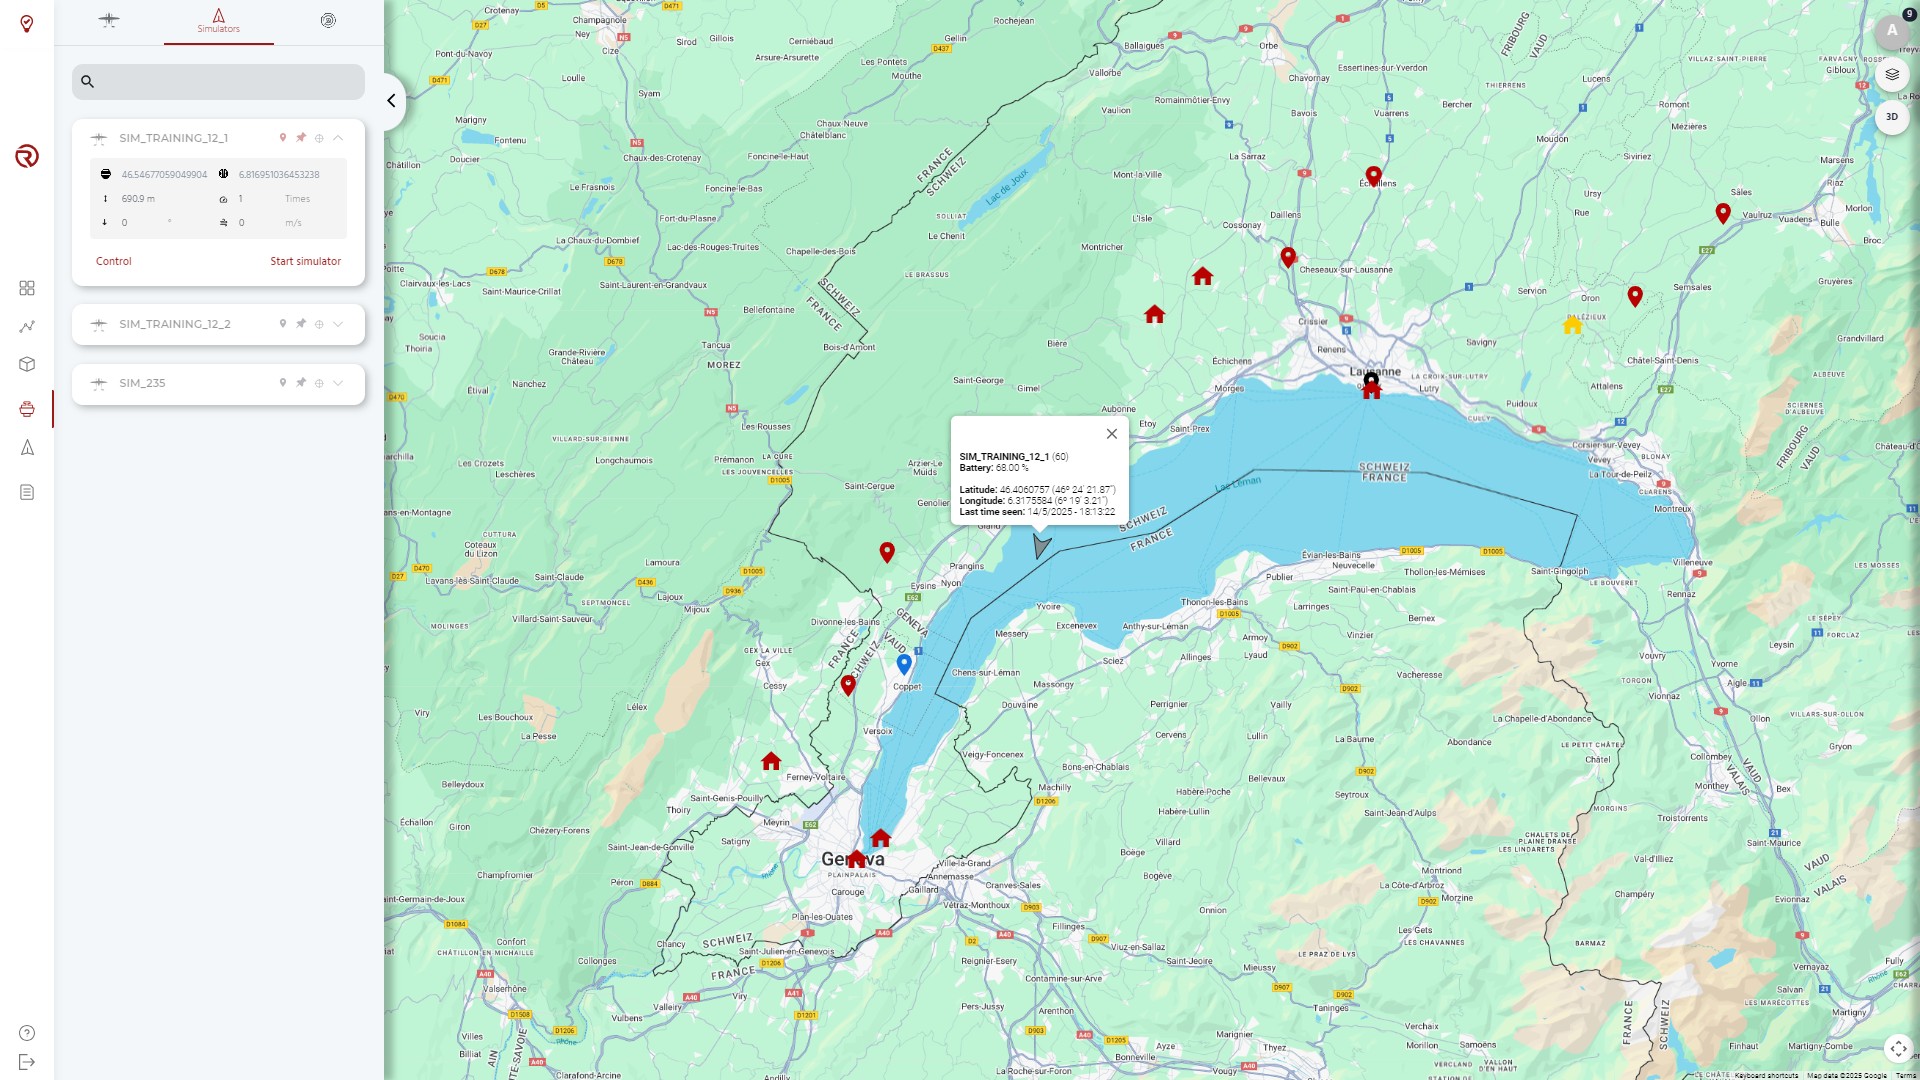
- Show last known position: shows the last known position of the vehicle through a grey symbol on the map. Its coordinates are shown when clicking on it.
- Pin map to drone: fixes the center of the map to the position of the specific vehicle.
- Go to drone: goes to the position of the specific vehicle.
- Show/hide information: shows/hides information of the vehicle and control options. If the vehicle is connected, the battery and the flight mode will be displayed (see Simulators).
Show last known position
When clicking on "Show last known position", the last known position of the vehicle being controlled will be displayed on the map. By clicking on it, a window will pop up containing the information of the name of the UAS, the remaining battery before losing connection, the last known coordinates and the last time of connection.
Simulators
In order to simulate a route, the "Drone control" has a dedicated page for simulators. The interface is mostly identical to the interface of the "Drone" page, but with some differences to start them.
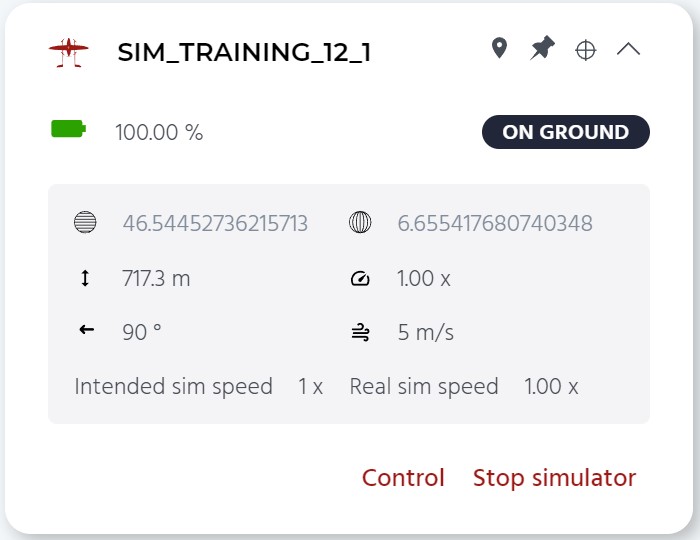
Available information:
- Battery of the vehicle: shows the battery of the vehicle.
- Flight mode: shows the status of the vehicle.
- Simulator information: shows the position and speed of the simulator.
- Latitude and Longitude: coordinates at which the simulated vehicle will start. The latter need to be close enough to the takeoff point of the simulated route. Otherwise, a warning will be displayed showing the deviation and the simulator they will not take off.
- Altitude: altitude at which the simulated vehicle will start (ground altitude in m AMSL).
- Simulator speed: speed at which the simulator simulates the flight (by default, 1). From 1 to 10, speed 1 intends to be real-time simulation (ideal for training and validating operational procedures), while 10 represents a faster simulation (better for supporting the validation process of a flight plan).
- Wind direction and speed: allows to simulate wind conditions based on its direction and speed. The conditions will be kept until the simulator is stopped.
- Intended and real speeds: when simulators are started, the intended and real simulator speed will be displayed.
- Start/stop simulator: allows to start/stop the simulator (depending on the status of the simulator). The different options are:
- Start simulator: allows to start the simulator at the specified location (shown coordinates).
- Starting simulator: after clicking on "Start simulator", this message will be shown during a few seconds, until the simulator has started correctly.
- Stop simulator: allows to stop the simulator. After using them, simulators should always stopped in order to avoid problems due to the use of the resources of the server.
- Stopping simulator: after clicking on "Stop simulator", this message will be shown during a few seconds, until the simulator has stopped correctly.
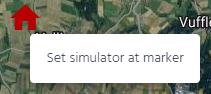
How to select the position of a simulated vehicle
Before starting a simulator, the desired position can be selected by right-clicking on the map and click on "Start simulator here". The coordinates and altitude shown in the simulator information will change automatically. The simulator can then be started. Simulators can be started at an empty location, but also at a marker or a base.
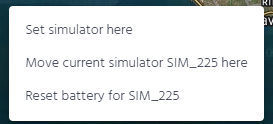
In order to change the position of the simulator, with the control of a simulator taken, users should right-click on a base or marker (or in at an empty location) and click on "Move current simulator [ID of the simulator] here". Another option is to stop it and restart the process from a new empty position.
Moving and resetting started simulators
In order to change the position of a started simulator, with the control of the simulator taken, users should right-click on an empty space of the map and click on "Move current simulator [ID of the simulator] here". A similar process is required to reset the battery of the simulator ("Reset battery for [ID of the simulator]").
Limitations
- If the takeoff point is higher than the landing point, the simulator will crash in flight when the flight plan crosses the same altitude as the takeoff point.
- If the takeoff point is lower than the landing, the drone will land inside the ground at the same altitude as the takeoff point.
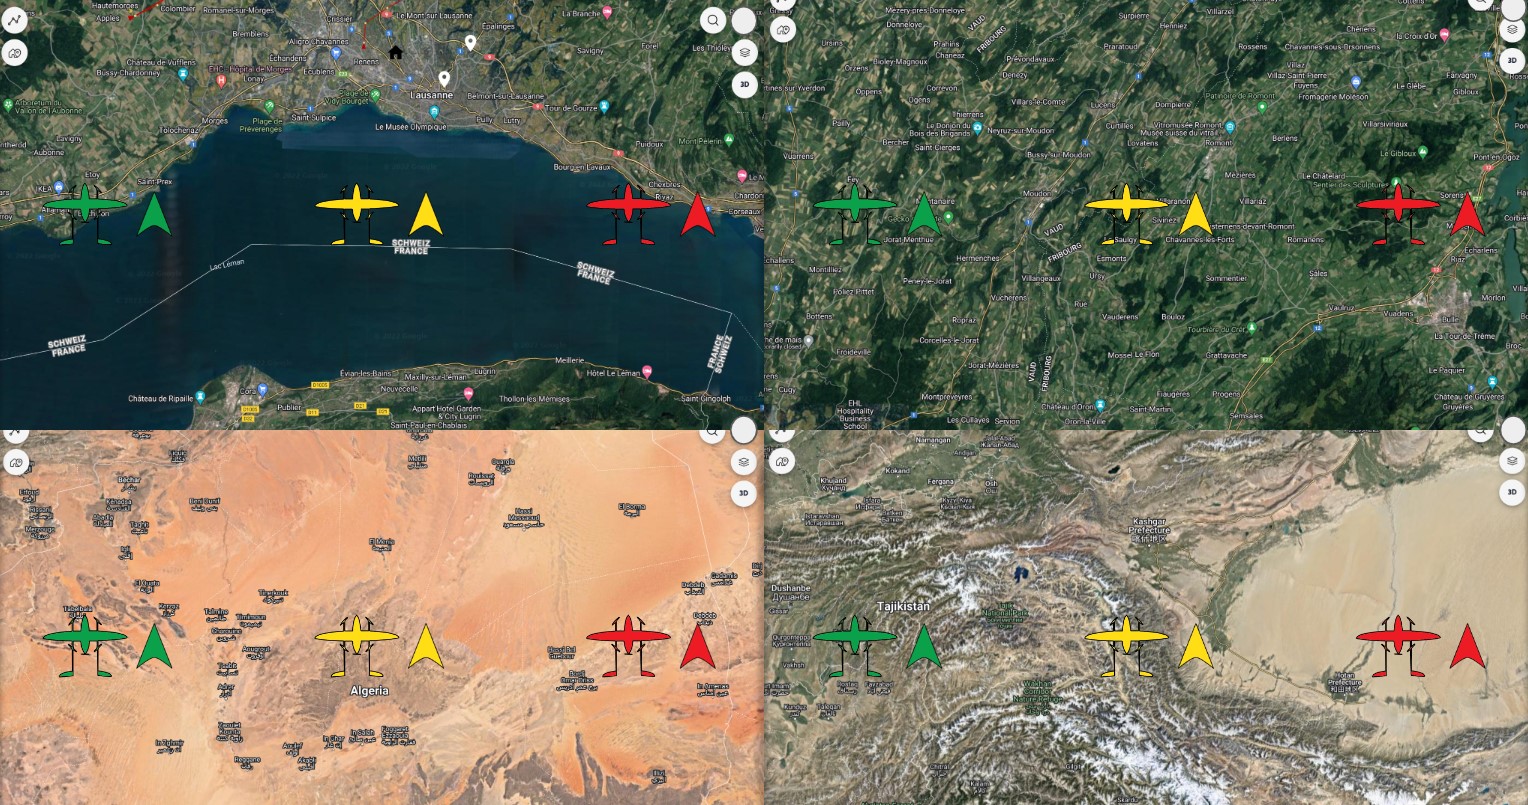
Representation of drones and simulators
Drones are represented with the icons of drones, while simulators are represented with triangles. The presented colours depend on their status (see Messages, status and operation boxes).
Simulated air traffic
Air traffic may be simulated by going to the "Air Traffic Sim" tab, right clicking on the map and selecting "Add simulated aircraft here".
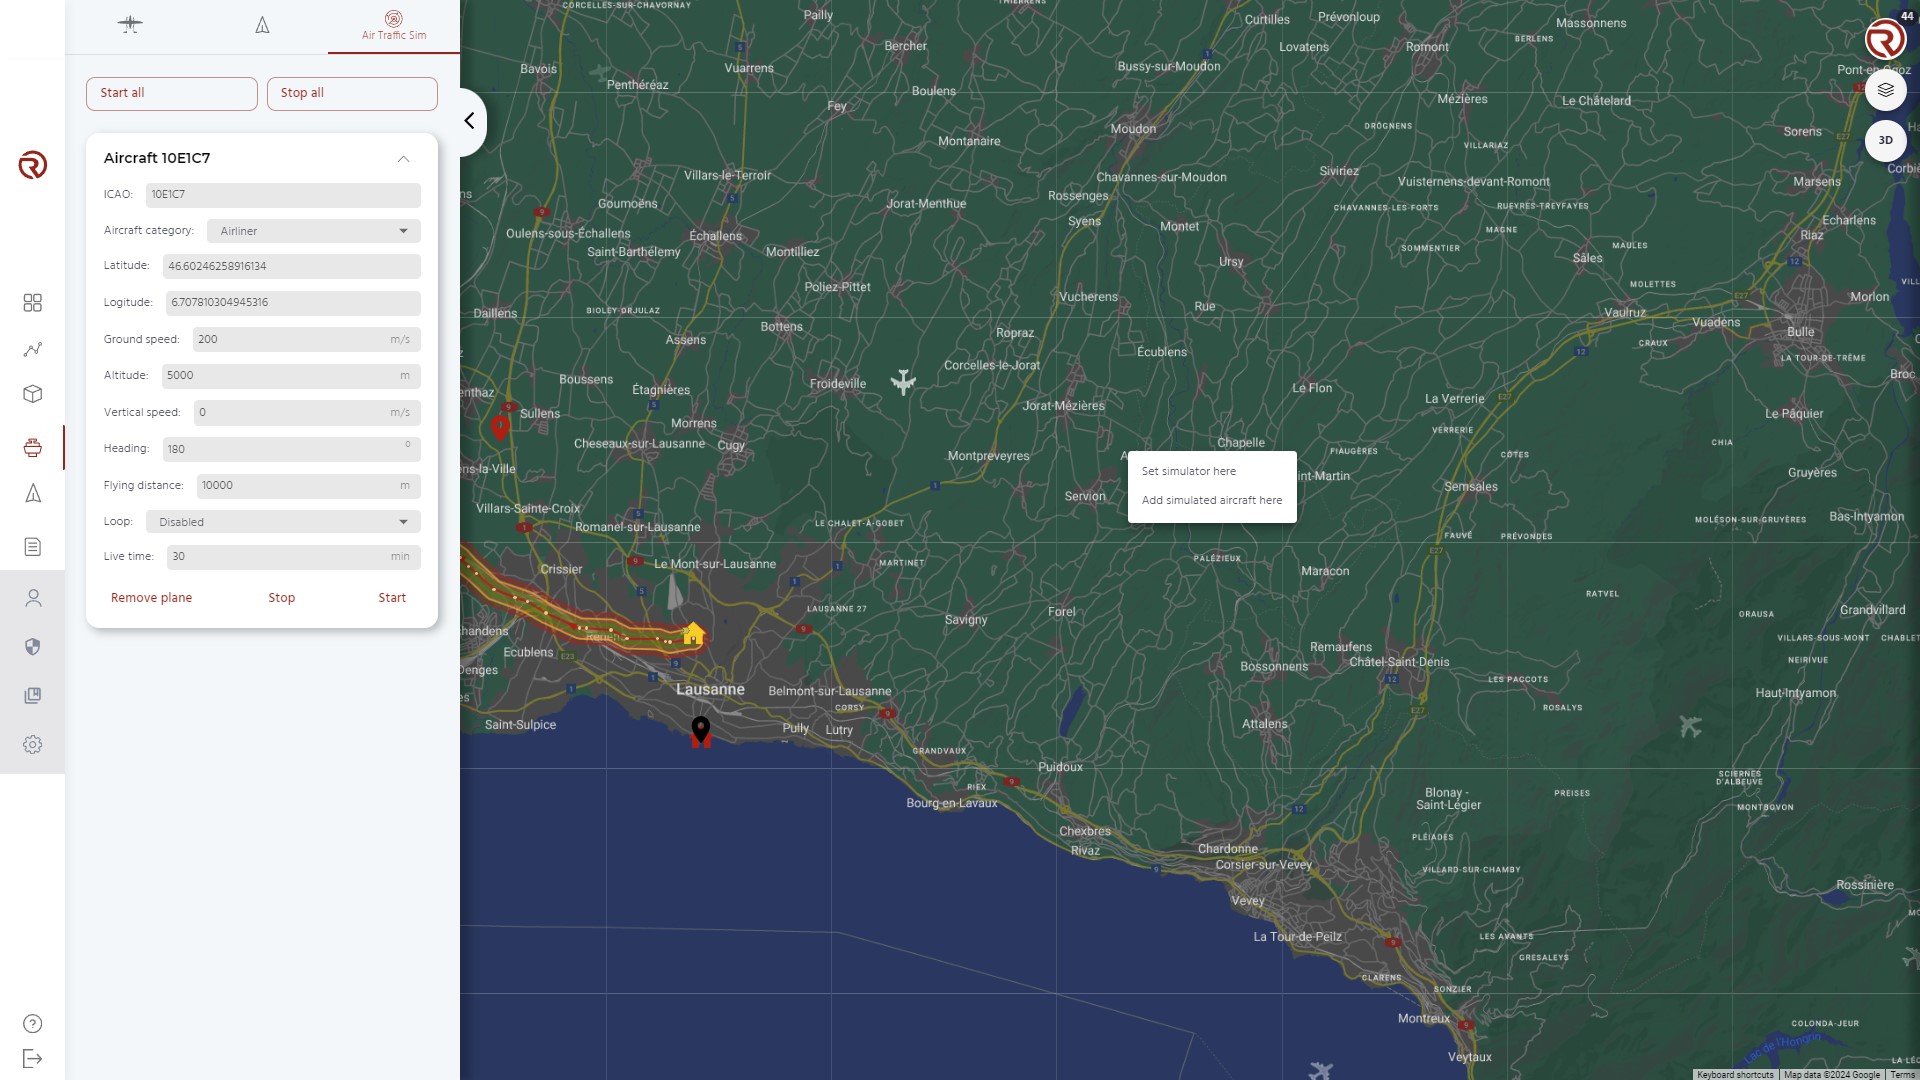
For each new air traffic simulator, the following settings may be configured:
- ICAO number: (randomly generated) identification of the simulated aircraft.
- Aircraft category: airliner, light airplane, helicopter parachute or balloon.
- Coordinates
- Ground speed
- Altitude
- Vertical speed
- Heading
- Flying distance
- Loop (continuously repeat the simulation)
- Live time: time for which the simulator will run
Simulated aircraft may be removed, stopped or started. Finally, all simulators may be started or stopped at once.
WARNING: SIMULATED AIRCRAFT MAY BE DETECTED BY REAL DRONES!